• Hi, I am the owner and main administrator of Styleforum. If you find the forum useful and fun, please help support it by buying through the posted links on the forum. Our main, very popular sales thread, where the latest and best sales are listed, are posted HERE

    Purchases made through some of our links earns a commission for the forum and allows us to do the work of maintaining and improving it. Finally, thanks for being a part of this community. We realize that there are many choices today on the internet, and we have all of you to thank for making Styleforum the foremost destination for discussions of menswear.
  • This site contains affiliate links for which Styleforum may be compensated.
  • STYLE. COMMUNITY. GREAT CLOTHING.

    Bored of counting likes on social networks? At Styleforum, you’ll find rousing discussions that go beyond strings of emojis.

    Click Here to join Styleforum's thousands of style enthusiasts today!

    Styleforum is supported in part by commission earning affiliate links sitewide. Please support us by using them. You may learn more here.

Shoemaking Techniques and Traditions--"...these foolish things..."

deez shoes

Distinguished Member
Joined
Jun 1, 2016
Messages
1,142
Reaction score
7,281
Well, "in a good way" can just be another way of saying "I don't want the hassle." Or "I don't want to mess with perfection."

It's true that some elements...esp. toe broguing and so forth...will be misplaced or distorted by relasting to a smaller size. And it can be a lot of work esp. since the toe stiffener will probably have to be replaced. If All-Purpose cement has been used in mounting the toe stiffener, it is doubly...no, triply...difficult and fraught with some danger.

And most shoemakers will have some qualms about the distortion of the "lines" of the shoe that will occur during re-lasting. But a half size is only 5/32"...more or less...in length.

All that said, you didn't ask if it would be pretty. You asked if it would cause damage to the shoe or impact the wear. And done mindfully neither of these issues are significant.

I have relasted to longer lasts as well as shorter lasts. IIRC, ntempleman has also.

It's not easy but re-lasting to a larger size is generally speaking harder than relasting to a smaller size.

Bottom line, it can be done.

Thanks for the info. I'm willing to bet that the shoemaker just doesn't want to mess with the perfection of the finished product.

I can't blame him, though. I'd probably not be too happy to distort or modify a project I'd spent months working on and deemed the finish product a work of art.
 

deez shoes

Distinguished Member
Joined
Jun 1, 2016
Messages
1,142
Reaction score
7,281
I've added some color to a pair of boots but the color still bleeds onto my clothes. What do shoemakers use to seal hand painted shoes?
 

deez shoes

Distinguished Member
Joined
Jun 1, 2016
Messages
1,142
Reaction score
7,281
What product(s) and process did you use?
A primitive n00b mixture of acrylic leather paint and Saphir cream. That's probably why they still bleed.

The boots are natural kudu so they lacked color to begin with. I think I used Saphir Rénovateur first, then applied the mixture.
 
Last edited:

DWFII

Bespoke Boot and Shoemaker
Dubiously Honored
Joined
Jan 8, 2008
Messages
10,132
Reaction score
5,714
If you let the acrylic paint dry thoroughly and never got it wet, it may be the Saphir that is staining your clothes.

Acrylic paints are water soluble, however. The best you can do...probably...is to put several coats of a clear wax over it.

Sometimes leather comes with a clear coat as a finish--this too is water soluble but not so much as the paint. If you know a repairman, or even a maker, that is familiar with these products and the process required to use them, you could try that.

All that said, an acrylic paint is probably not the right approach or the right product unless you're painting "cartoons" on your shoes.
 

deez shoes

Distinguished Member
Joined
Jun 1, 2016
Messages
1,142
Reaction score
7,281
If you let the acrylic paint dry thoroughly and never got it wet, it may be the Saphir that is staining your clothes.

Acrylic paints are water soluble, however. The best you can do...probably...is to put several coats of a clear wax over it.

Sometimes leather comes with a clear coat as a finish--this too is water soluble but not so much as the paint. If you know a repairman, or even a maker, that is familiar with these products and the process required to use them, you could try that.

All that said, an acrylic paint is probably not the right approach or the right product unless you're painting "cartoons" on your shoes.
lol!@"...painting "cartoons" on your shoes."

Is there another product or process that you may know of which may work best for adding/changing colors on shoes?

I read somewhere online about vinegaroon but it seems like that only works for turning shoes black.
 

DWFII

Bespoke Boot and Shoemaker
Dubiously Honored
Joined
Jan 8, 2008
Messages
10,132
Reaction score
5,714
lol!@"...painting "cartoons" on your shoes."

Is there another product or process that you may know of which may work best for adding/changing colors on shoes?

I read somewhere online about vinegaroon but it seems like that only works for turning shoes black.

There are water soluble dyes and,, of course, alcohol based dyes. The WS dyes seem to be pretty permanent once fully dry. And the Alc. dyes are really permanent. Both can be thinned with their respective solvents to carry less pigment.

That said, patinating shoes with dyes isn't really my forte...I do some but there are others who are much better than I am. I just know about acrylic paints from my saddlework--where, on occasion, scenes, figures, animals, etc., are tooled and then painted. Cartoons, IOW. I've seen shoes that had similar work done on them.

The cartoons are then generally coated with a resin or acrylic finish. TanCoat™ comes to mind.
 
Last edited:

ThunderMarch

Distinguished Member
Joined
Oct 23, 2014
Messages
1,734
Reaction score
1,806
Pertaining to the wool felt used as "filler material" in place of cork, by some shoemakers, is there any fundamental difference between these (or are they in any way unique and specially produced), as opposed to the commonly available type of wool felt (for example used in arts and crafts) that seems to be quite readily available otherwise?

For example, a random google search of "where to buy wool felt" yielded something as such, on ebay.
Ignoring all the wool / synthetic blends, there is a (alleged) pure wool one:
http://www.ebay.com/itm/Single-Sheet-100-Virgin-Merino-Wool-Felt-8-X-12-/301336742340

Are these one and the same thing?

Pardon my ignorance / naivety.
 

DWFII

Bespoke Boot and Shoemaker
Dubiously Honored
Joined
Jan 8, 2008
Messages
10,132
Reaction score
5,714
I suspect it doesn't matter although the wool felt I use is 3/16"-1/8" thick and comes in rolls 48" wide and who-knows-how-many yards long.

Try Sutherland Felt...I don't remember offhand what exactly I am using (it has a product number) except it is pure wool. A person might be able to get samples.
 

deez shoes

Distinguished Member
Joined
Jun 1, 2016
Messages
1,142
Reaction score
7,281
Someone raised a concern on another thread regarding crooked captoes on a pair shoes. Does anyone know what methods are used to make captoes on shoes and what can lead to consistently ending up with crooked ones?
 

DWFII

Bespoke Boot and Shoemaker
Dubiously Honored
Joined
Jan 8, 2008
Messages
10,132
Reaction score
5,714
Poor patterns, poor lasting techniques, adding extra material to the last after a trial fitting without also changing the pattern. Who knows?
 

mw313

Distinguished Member
Joined
Mar 21, 2014
Messages
2,452
Reaction score
525
Hi everyone! i just posted this to the bespoke shoes thread but since i included so many detailed pictures of the building process I figured that everyone here would have interest in this set of posts as well!


Hey everyone! I hope all are doing well and I finally received my newest bespoke project from a relatively unknown bespoke maker of Serbia. His name is Igor Suhenko and he makes shoes in the style and form of St. Crispins with the pegged waist and hand welted for the rest, but also dyes his own leathers too. To follow is the write-up of the entire process of his shoe making for me.

Enjoy!

Matt

I spoke to Igor by email and since I have been way too busy to visit Serbia, I sent Igor all of my normal measurements (ball, instep, short and long heel, as well as drawings of my feet and even a reasonably comfortable shoe so he could evaluate the fit that I like compared to my measurements. I also included comments on how I could have the sent shoe to have an even better fit. I sent him the trial shoe from my bespoke Maftei shoes (my current best fitting shoes).

View attachment 804291

He made me a pair of trial shoes in a brown buffalo leather just to try out the fit of the new last he had made. It fit quite well overall, so we moved forward with discussing the final style of the shoes that I would want. If the trial shoe didn't fit so well, he would have done some more modification on the last before proceeding with the patterns making of the final shoe.

The quality was great on the trial shoes. They weren't welted like how Antonio Meccariello does his trial shoes but Igor gave the option to finish them after the final pair was done so he could adjust the fit on these trial shoes if needed. (Of course I will be taking him up on that to have a great casual shoe!!!)

View attachment 804292 View attachment 804293 View attachment 804294


We discussed that I wanted a pair of wing tip balmoral shoes with a red/brown leather as well as the upper balmoral part to be in a very soft mid/dark brown suede. He stated that he could make is own color for the leather and was able to acquire a very soft goat skin to make into a reverse calf suede.

He had a last made similar to a thin chisel last by Corthay that I desired based on my measurements and then started to work on the patterns for that last.
View attachment 804162 View attachment 804163 View attachment 804164 View attachment 804165

Next he started to work on the hand dying of the leather to prepare it to go with the patterns he just made. I wanted a brown but with some deep read hues almost like a GG vintage cherry mixed with the Vintage Oak.
View attachment 804166 View attachment 804167 View attachment 804168

Next, he used the patterns he made to cut into the two leathers we discussed. He made sure to only use the best pieces of the leather in doing so. View attachment 804172 View attachment 804173

View attachment 804175

Next step was to prepare the suede and calf components to be sewn together. They were lined up and then used a sewing machine on a very fine setting. Sewing was done to attach the lining to the upper parts as well.

View attachment 804188
View attachment 804196
View attachment 804189 View attachment 804190 View attachment 804192

View attachment 804187 View attachment 804197 View attachment 804191


He also made the brogue/punching details for the upper along with the medallion by hand.


View attachment 804193 View attachment 804194 View attachment 804195

The next step was when he was preparing the insole by cutting it to the size of the bottom of the last. It was shaved down to size and then attached to the bottom of the last. The hold fast was prepared entirely out of leather (no gemming was used).

View attachment 804198 View attachment 804200 View attachment 804201 View attachment 804205 View attachment 804207 View attachment 804208 View attachment 804211 View attachment 804210 View attachment 804213


The toe puff and heel counter were made out of leather at this same stage in preparation. They were cut to size and shaved on the edges to get a smoother transition. Rough or sharp edges would be felt while wearing the shoe, so they are bevelled to make that gradual transition, while still being thick enough to add the strength and support that are needed in these areas of the shoe.


View attachment 804216 View attachment 804217 View attachment 804218 View attachment 804219

Now that the upper and insoles were both prepared, the toe puff and heel counter could be attached between the lining and upper.

View attachment 804223 View attachment 804224 View attachment 804225 View attachment 804226


The upper was nailed to the insole and welt was then sewn to the upper/insole complex. View attachment 804227 View attachment 804228 View attachment 804229 View attachment 804230


Attachment of more leather to the heel area was prepared so the shank could then be added from the heel to the mid-foot area. The shank was attached by wooden pegs.

View attachment 804231 View attachment 804232 View attachment 804233


Finally the cork foot bed was cut and attached to the forefoot area.

View attachment 804234 View attachment 804235

View attachment 804236

Now that the majority of the shoe was prepared, the outsole needed to be attached. An extra thin piece of leather was attached to the forefoot to cover the area where the cork was placed, so it would not be damaged at all.

A channel was made into the outsole to thin it out. This allows for the thin covering to go over the stitching to completely conceal the attachment of the outsole to insole. The outsole was then completely stitched to the rest of the shoe at the welt.

View attachment 804237 View attachment 804238 View attachment 804239 View attachment 804240 View attachment 804241 View attachment 804242 View attachment 804243

Now that the general shoe was finished, the finishing details come into play.

The heel has to be made which is by stacking multiple layers of leather on top of each other. They are glued together per layer but then also nailed together into the shoe itself.

View attachment 804249
View attachment 804257 View attachment 804250 View attachment 804253


The edge of the welt was finished by using a fudge wheel to give clean lines onto the entire top of the visible welt.

View attachment 804260


The waist was made super close by having extra welt cut off and then the outsole was shaved down to bevel and give an elegant fiddleback to the waist.

View attachment 804264 View attachment 804262 View attachment 804263


Since this shoe had a pegged waist it helped to give the tighter waist but it was rubbed down with hot iron to smooth the wooden edges and painted over to conceal them as much as possible.


View attachment 804271
View attachment 804267 View attachment 804268 View attachment 804269 View attachment 804270

Finally the heel was attached and polished as well as the final polish application to the entire shoe. Then laces were inserted and the shoe trees were placed.

View attachment 804278 View attachment 804279 View attachment 804280 View attachment 804281 View attachment 804282 View attachment 804285 View attachment 804286 View attachment 804287 View attachment 804288


I hope you all have enjoyed the process as well as the final shots of these shoes. If anyone is interested in Igor Suhenko, I would highly recommend him.

Many of you know that I have bespoke shoes from many shoe makers from the US and Europe, as well as top MTO/MTM shoes from around the world, and Igor's work is up with the best of them. To make things even better he costs much less than Bespoke shoes from the UK and even Italy.

I'd be more than happy to answer questions on anything as well.

View attachment 804277

View attachment 804283

View attachment 804284
 

Notch

Distinguished Member
Joined
Jul 27, 2010
Messages
2,966
Reaction score
7,229
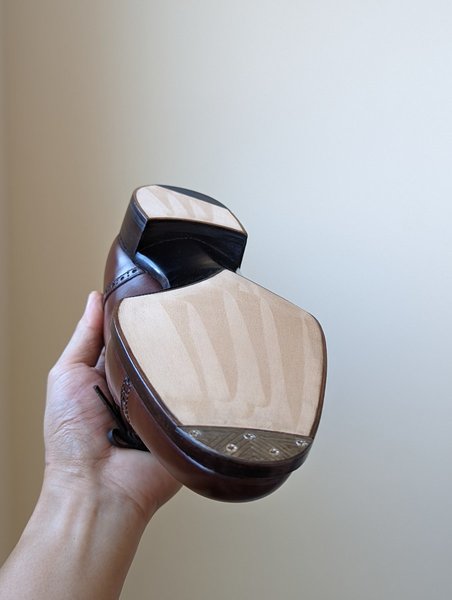
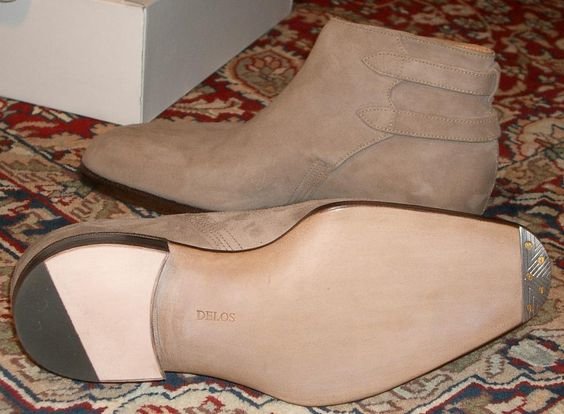
Can anyone tell me the exact name of the tool that is used to make these triangular patterns on the sole? I know each tool has a specific name, I just can't seem to find it on Google.
Screen Shot 2017-07-19 at 10.57.21.png
 

Featured Sponsor

How important is full vs half canvas to you for heavier sport jackets?

  • Definitely full canvas only

    Votes: 101 36.7%
  • Half canvas is fine

    Votes: 99 36.0%
  • Really don't care

    Votes: 35 12.7%
  • Depends on fabric

    Votes: 44 16.0%
  • Depends on price

    Votes: 41 14.9%

Forum statistics

Threads
507,741
Messages
10,598,127
Members
224,496
Latest member
BrooklynSavan
Top